Monthly Archives: April 2011

Homemade Cookie Ice Cream Sandwiches

Sorry about the lack of posts last week.  My dog literally ate my ‘homework’, which in baking terms means my dog (Kettle calls her “the stomach”) attempted to eat a 2lb bag of flour while I was at work and became violently ill, consuming a lot of my time last week. She is going to be fine, but the jury is still out on the carpet.  May you never have to try to get paste made from flour and dogdrool out of your carpet!  What a mess.  But enough with the excuses and on to the good stuff!  Baseball/ballpark food week continues!

So festive and fun!

Mmm hmmm, you read the title of this post right.  I went there.  I made them at home there by forcing myself to eat way too many of them.  But you know what?  I liked it. Every last bite.
The cookie ice cream sandwich is my brother’s weakness.  The boy can pop them down like its going out of style.  Not normally someone I would like to for recipe ideas or food advice, he is a true junk foodie, whose diet includes things like Hot Pockets and Doritos. But in the case of the cookie ice cream sandwich, I can’t fault him.  They are dang good and even better on a hot day.

Who doesnt love having these guys around?

These are silly easy and I think that is the biggest problem with the recipe.  If you can make chocolate chip cookies, and have the patience to combine said cookies with ice cream in an orderly fashion (as opposed to swallowing them all whole in some cookie monster style feeding frenzy), then you can make them too!  Oh, and mini sous chefs love them too.  Then again, I think everyone loves them.

In need of sprinkles.

The only bonus to making them at home, besides being able to play with different cookie/ice cream combos, is portion control.  I chose to make mine on the smaller side as to minimize the guilt of eating them.  Oh, who am I kidding, I don’t feel guilt.

I swear I didnt eat them all!

Homemade Cookie Ice Cream Sandwiches

For this recipe, I used a classic chocolate chip cookie and paired it with vanilla ice cream.  Feel free to get creative!  You can use any combo you can think of!

Classic Chocolate chip cookies (small batch)

1+1/8 cup flour

1/2 tsp salt

1/2 tsp baking soda

3/8 cup brown sugar

3/8 cup white sugar

1/2 cup butter, softened

1/2 tsp vanilla

1 egg

4-6oz semi-sweet chocolate chips

Cream together butter, white sugar, brown sugar and vanilla.  Beat in egg.  Slowly combine in dry ingredients.  Once well combined, fold in chocolate chips.  Bake at 375°F for 8-10 minutes.

Make cookies as directed and allow them to fully cool on a cooling rack.  Be careful to make evenly sized cookies so they make prettier sandwiches.  I made the cookies one night and assembled the sandwiches the next so I didn’t rush it.   When you are ready to assemble, let the ice cream sit on the counter for 15 minutes.  This allows it to soften and make assembly much easier.  Assemble cookies and ice cream, and then rotate sandwich on end in a bowl of sprinkles (or mini chips) to decorate.  Pop sandwiches back in the freezer for a few minutes to allow the ice cream to firm back up.
Enjoy!

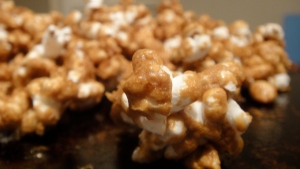
Homemade Caramel Popcorn with Peanuts

I should warn you, the recipe is not hard and highly addictive, which, let’s be honest, is the worst combination imaginable.  I can’t stop eating it.  That said, I still think you should give it a go, but just remember I warned you. 

Oh you know you want it!

Spring has finally returned, and you know how I am certain?  Flowers? Nope. April showers? We’ve had plenty of those, but that’s not it either. Birds chirping?  There is a particularly annoying set living outside my bedroom, but that’s not it either.  It’s baseball season! 

Get in my belly.

Ok, even if you are not a fan of America’s favorite pastime that doesn’t mean you can enjoy the snacks that come along with it!  Caramel popcorn with peanuts is easy and another great recipe to share with the mini sous chef in your life.  You can also adapt it to add in any number of things you might find fun (nuts, candy, etc).  I went with peanuts because Kettle is not allergic to them and they are quintessentially baseball to me. 

Potential. I see great potential for you.

I started with plain, stove top prepped popcorn, not microwave.  Now if you have never tried stove top prepped before, it’s really easy and allows you 100% control on the salting and flavoring of your popcorn.  Since I planned on dousing mine in caramel, I wanted to start with a clean slate, er kernel.  The caramel sauce was easy and much faster to prep than I expected.  It was also kind of exciting!  After you the brown sugar, butter, corn syrup, and salt to a boil, you add in vanilla and baking soda causing the mixture to foam up/double in size.  Visually, it’s pretty cool.  Yet another reason a mini sous chef will enjoy it. After that it’s just drizzle, mix, and bake to set the caramel.

Caramel Popcorn with Peanuts

Based on this recipe.

Ingredients:

3 quarts popcorn, popped

1 cup brown sugar

1 stick butter

1/4 cup corn syrup

1/2 tsp vanilla

1/3 tsp salt

1/2 tsp baking soda

peanuts (or candy) to taste

Combine brown sugar, butter, salt, and corn syrup in a sauce pan.  Bring to a boil and continue to boil for 2 minutes with continuous stirring.  Remove from heat and add vanilla and baking soda.  Mixture will begin to foam up, so continue stirring.  Slowly fold caramel into popcorn.  Once well combined, add in peanuts (or other item of choice).  Lay mixture flat (or as flat as you can) on greased cookie sheet and bake at 250°F for 10-15 (turn mixture once).

Enjoy!


Week Recap: Lemons!

Lemons!

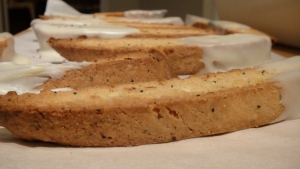
This week I was in a sour mood, or at least my baking was with all the lemons I used!  The biscotti was highly successful (my boss called it “off the chain”) and the nut-free macarons were a step in the right direction.  Thank you again for all of your comments and helpful ideas!  I really appreciate them and I can’t wait to get back to optimizing my nut-free macarons!

Ready to make friends with a cup of tea.

Notable points from the week:

What I’m reading: Gumbo Tales by Sara Roahen.

What I’m thinking about: Adult beverage time (its been one of those weeks)

What I’m excited for: Sunshine!  It’s back.

Teaser for This week’s posts: Put me in coach.  I’m ready to play!

Happy Sunday!


Nut-free Lemon Macarons, attempt #1

As I have previously mentioned, Kettle has a severe nut allergy.  Like break out the epi pen and rush him to the hospital severe.  And being the paranoid and nervous Pot that I am, I try not to bring nuts in the house because I am so afraid of making him sick or cross-contaminating something he might eat.  I was actually so nervous about it when we first started dating that I googled the fastest route to the hospital just in case.  I’m a nut, but one he’s not allergic to. 

Nut-free is the way to be.

This has been a huge challenge for me with regards to my mild obsession with the french macaron.  I love their look with their brightly colored, tiny little, almost cartoonish packages and their soft and light yet crisp texture (I’ve been dying to get my oven mitts on Jill’s book, Mad about Macarons, so I can explore more).  But, being that I refuse to bring almond flour into the house (even though Kettle has offered numerous times to leave the apartment while I bake so any aersolized almond flour doesn’t kill him), I have been on a personal mission to create nut-free macarons so he can enjoy their sheer wonderfulness and so I don’t have to plan my baking expeditions around his business trips.  What can I say, I’m smitten with macarons.  Oh, and of course Kettle. 

Pucker up!

I was inspired this week by Brave Tart’s post on “10 macaron myths” especially when I stumbled upon number 4: Even using Almonds.  To be honest, just leaving out the almond flour had never even crossed my mind.  It seems so obvious, but I’ve been tooling around with various bizarre, some successful some not so successful, alternatives (posts to come on these escapades!) when I could have tried leaving it out all together.  Hmm. I love it when the answer is right in front of my nose.

I have zero skills with the pastry bag. It's ugly. Trust me.

The macarons were very fragile!  More so than those made with almond flour. The flavor of both the shell and curd were well received, but the shells were so fragile it made transporting and storing them a real challenge. They looked a little ugly by the time they got to french lunch, but my fellow lunchers had no issues eating them. 
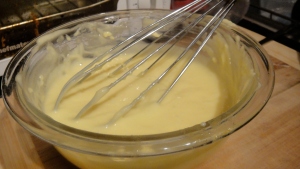
Lovely lemon curd.

Upon discussion of the structural integrity of my macarons with my boss (not kidding, this is how our workplace rolls) we decided that in the absence of almond flour, a substitute is essential to give the macaron the strength to ‘hold up’ the curd/ganache/frosting.  She suggested cream of tartar, but I’m contemplating other options. So back to the lab, er, kitchen I will go to try again.
Overall, there was definitely some success.  The cookies I made look like french macarons, they just need a little tweaking to become french macarons.  The lemon curd was excellent.  In fact I could eat it with a spoon.

Nut-free Lemon Macarons

2+1/2 egg whites (save the yolks for the curd!)
1 tbsp sugar
2 cups confectioners sugar, sifted
food coloring
lemon zest
Beat egg whites until soft peaks form.  Slowly beat in sugar.  Once firm peaks form, add food coloring and lemon zest.  Slowly fold in confectioners sugar.  Pipe 1 inch circles on parchment lined cookie sheets.  Bake at 250°F for 5 minutes.  Remove from oven, turn temperature up to 375°F and return to oven once temperature is reach.  Bake 6-8 minutes.

Awesome Lemon curd

based on this recipe
2 eggs
2 egg yolks
1/3 cup sugar
1/3 cup fresh squeezed lemon juice
1 tsp lemon zest
1/4 tsp salt
6 tbsp butter
Whisk eggs, yolks, sugar, lemon juice, zest, and salt in a bowl that can be used as for a double boiler.  Once well blended,  set bowl on sauce pan of simmering water.  Whisk curd-to-be constantly as it will begin to thicken as it warms up. Heat the mixture to 170-175, but don’ let it boil.  Once temperature is achieved, remove from double boiler and whisk in butter.  Once well blended, cover with plastic wrap and refrigerate.
Enjoy!